Difference between revisions of "Config/Install/Linux/Install Server"
| Line 47: | Line 47: | ||
The installation is done with commands in a terminal window.<br> | The installation is done with commands in a terminal window.<br> | ||
| − | |||
| − | |||
| − | |||
| − | |||
| − | |||
| − | |||
| − | |||
| − | |||
| − | |||
We recommend that you install the system in folder /Applications/C3System. <br> | We recommend that you install the system in folder /Applications/C3System. <br> | ||
Create the installation folder with the following command.<br> | Create the installation folder with the following command.<br> | ||
| − | <code>sudo mkdir / | + | <code>sudo mkdir /opt/C3System</code><br> |
<br> | <br> | ||
Set read write permissions for the folder. Depending on how you are using your system you may need to set the permissions to 777 while installing. Remember to set it correct after the installation process.<br> | Set read write permissions for the folder. Depending on how you are using your system you may need to set the permissions to 777 while installing. Remember to set it correct after the installation process.<br> | ||
| − | <code>sudo chmod 777 / | + | <code>sudo chmod 777 /opt/C3System</code> or |
| − | <code>sudo chmod 755 / | + | <code>sudo chmod 755 /opt/C3System</code><br> |
<br> | <br> | ||
;Download and copy | ;Download and copy | ||
| − | :Download and copy the installation file <b>"c3fire-vx.x.x.x-install-mac.tgz"</b> to the install folder / | + | :Download and copy the installation file <b>"c3fire-vx.x.x.x-install-mac.tgz"</b> to the install folder /opt/C3System.<br> |
:Go to that folder in the terminal window. | :Go to that folder in the terminal window. | ||
| − | :<code>cd / | + | :<code>cd /opt/C3System</code> |
;Uncompress | ;Uncompress | ||
| Line 75: | Line 66: | ||
:<code>sudo tar zxvf c3fire-v4.1.0.0-install-mac.tgz</code> | :<code>sudo tar zxvf c3fire-v4.1.0.0-install-mac.tgz</code> | ||
:The installation will create the C3Fire folder structure, see [[C3Fire:Config/Install#Folder Structure (Where to find things)|Folder Structure]] at installation start page. | :The installation will create the C3Fire folder structure, see [[C3Fire:Config/Install#Folder Structure (Where to find things)|Folder Structure]] at installation start page. | ||
| − | ::/ | + | ::/opt/C3System/C3LearningLabs/C3Fire/... |
;Set access rights | ;Set access rights | ||
:Set read write permissions for the C3System folder structure. | :Set read write permissions for the C3System folder structure. | ||
:Depending on how you are using your system you may need to set the permissions to 777. | :Depending on how you are using your system you may need to set the permissions to 777. | ||
| − | :<code>sudo chmod -R 777 / | + | :<code>sudo chmod -R 777 /opt/C3System/C3LearningLabs</code> |
:or | :or | ||
| − | :<code>sudo chmod -R 755 / | + | :<code>sudo chmod -R 755 /opt/C3System/C3LearningLabs</code> |
| − | |||
| − | |||
| − | |||
== License file == | == License file == | ||
Revision as of 10:34, 1 August 2021
The C3Fire distribution contains all you need to run the system.
It contains The C3Fire environment, and the needed Java environment.
Download System
The system can be downloaded from the download page.
Require a system license at the license page.
Install C3Fire Server
Select Server Computer
Select the computer that you want to have as C3Fire server. It should be visible in the network that you use when you run C3Fire sessions.
Contact your network administrator and make sure that the C3Fire server and the C3Fire clients should be able to communicate in the network. The C3Fire server and the clients should be able to communicate on a port that you can select. The default port is 8382 but you can define port number in the C3Fire server configuration.
The C3Fire Server uses a Jetty web server to distribute files to the clients. The Jetty web server uses the port 8380, can be changed in the configuration. It is also possible to use an external web server, then you need have write access to that web server.
IP address and Port number
Every computer in a network have an IP address. If a computer program accepts calls from an other computer its open a port and starts listens on that port number.
In IPv4 the port number is a number between 1-65535. Specific port numbers are often used to identify specific services.
The C3Fire server uses port 8382 by default. The web server uses port 8380 by default.
Backup old sessions
If you have an old C3Fire installation on the computer backup the old session log files.
The log files are stored at ../C3LearningLabs/C3Fire/Server/SessionLogs
- Example:
/opt/c3system/C3LearningLabs/C3Fire/Server/SessionLogs
- Move Current installation
- Move the current installation to a backup folder by changing the folder name.
- Example:
cd /opt/c3systemsudo mv C3LearningLabs C3LearningLabs-b170208
Installation
The installation is done with commands in a terminal window.
We recommend that you install the system in folder /Applications/C3System.
Create the installation folder with the following command.
sudo mkdir /opt/C3System
Set read write permissions for the folder. Depending on how you are using your system you may need to set the permissions to 777 while installing. Remember to set it correct after the installation process.
sudo chmod 777 /opt/C3System or
sudo chmod 755 /opt/C3System
- Download and copy
- Download and copy the installation file "c3fire-vx.x.x.x-install-mac.tgz" to the install folder /opt/C3System.
- Go to that folder in the terminal window.
cd /opt/C3System
- Uncompress
- Uncompress the c3fire system with the following command.
- In the command replace the version V4.1.0.0 number to the version number in the downloaded file.
sudo tar zxvf c3fire-v4.1.0.0-install-mac.tgz- The installation will create the C3Fire folder structure, see Folder Structure at installation start page.
- /opt/C3System/C3LearningLabs/C3Fire/...
- Set access rights
- Set read write permissions for the C3System folder structure.
- Depending on how you are using your system you may need to set the permissions to 777.
sudo chmod -R 777 /opt/C3System/C3LearningLabs- or
sudo chmod -R 755 /opt/C3System/C3LearningLabs
License file
The C3Fire server system needs a license file to be able to start.
The license file is supplied by C3 Learning Labs. If you do not have a license file, require a system license at the license page.
The license file should have the nameC3Fire.license, the case of the letter is important.
The license file should be copied to the folder: <C3LEARNINGLABS-ROOT>/C3Fire/Server/
Example: /Applications/C3System/C3LearningLabs/C3Fire/Server/C3Fire.license
With a correct C3Fire license file it is now time to try if the system is working on the server computer.
Test C3Fire Server
This test should be performed now before you have configure the C3Fire server.
Before the configuration the server will run as local host using the ip number 127.0.0.1.
You can start C3Fire server with the command below in a terminal window.
- Start with shell script
- Go to the C3Fire server folder: <C3LEARNINGLABS-ROOT>/C3Fire/Server/
- Example:
cd /Applications/C3System/C3LearningLabs/C3Fire/Server
- Example:
- Start the server with the following command:
sudo sh C3FireServer-Start-Mac.shsudo sh C3FireServer-Start-Mac-NoUI.shUse this if the server should not view user interface.
Recommended commands to start C3Fire server
cd /Applications/C3System/C3LearningLabs/C3Fire/Server
sudo sh C3FireServer-Start-Mac.sh
After some startup time the C3Fire server should write 'C3Fire Server Running', and 'Waiting On Manager'.
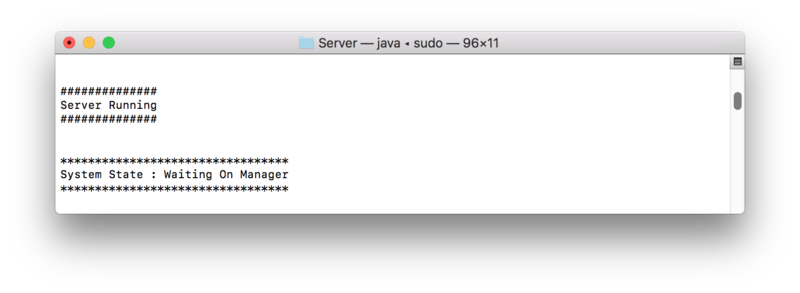
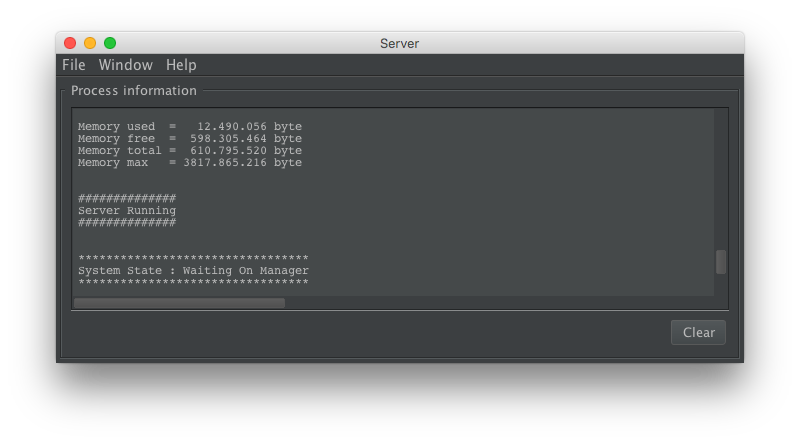
If the server did start you should test the web server.
If the C3Fire server does not start go to Troubleshooting C3Fire Server on Mac.
Test Web Server
When the C3Fire server is started, a preconfigurated Jetty web server also, automatically, is started.
The Jetty web server uses the standard web server port 8380.
You can test the web server by surfing to the server computer with a web browser.
Surf to : local host http://127.0.0.1:8380/
Recommended test
http://127.0.0.1:8380/
The browser should show the following page.
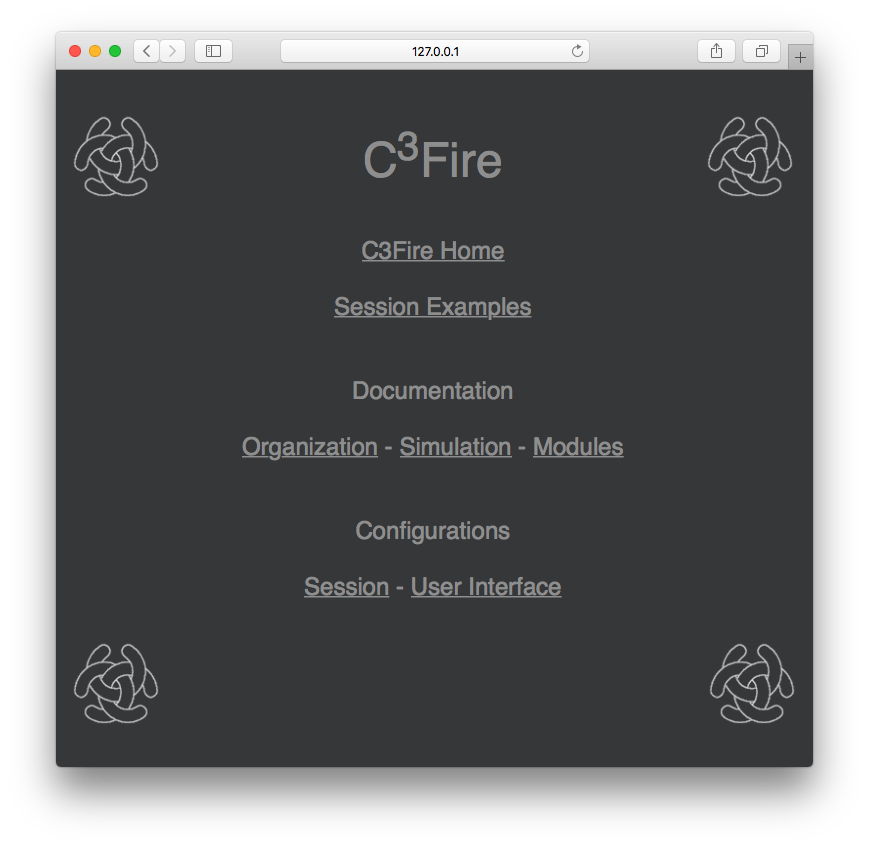
If the Jetty web server does not start go to Start Web Server Manually and try to start it.
If the web server does not start try to start it manually, see below.
Test C3Fire Client on Server Computer
Start C3Fire client on the server computer.
You can start a C3Fire client with the commands below in a terminal window.
- Start with shell script
- Start a new terminal window.
- Go to the C3Fire client application folder: <C3LEARNINGLABS-ROOT>/C3Fire/Client/Application/
- Example:
cd /Applications/C3System/C3LearningLabs/C3Fire/Client/Application
- Example:
- Start the client with the following command:
sudo sh C3FireClient-Start-Mac.sh
Recommended commands to start C3Fire client
cd /Applications/C3System/C3LearningLabs/C3Fire/Client/Application
sudo sh C3FireClient-Start-Mac.sh

After some startup processes the C3Fire client should open the following window.
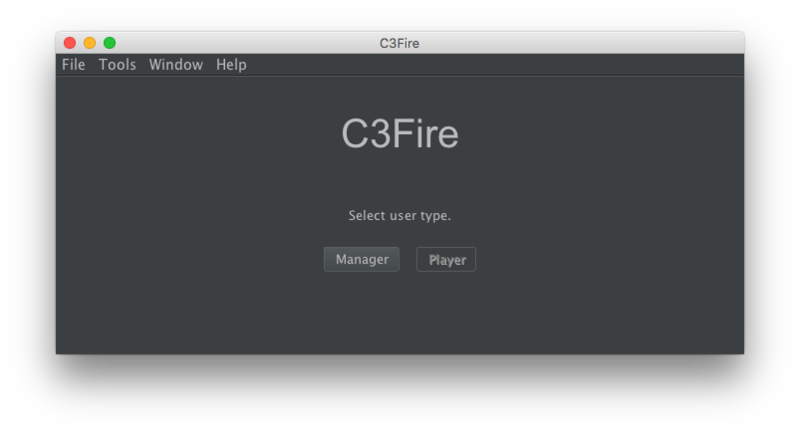
If the C3Fire client does not start go to Troubleshooting C3Fire.
Configure Server
Before you configure the C3Fire server test the un-configured C3Fire server described above, so that you know that the first installation step did work.
- The configuration you need to do:
- Set the IP number that the server computer have.
- If the server should be accessible from internet, outside the Local Area Network (LAN)
- Configure the router
- Open firewalls
Configure
The Server configuration is defined in the file <C3FIRE-Server>\C3FireServerConfig.xml
Example : /Applications/C3System/C3LearningLabs/C3Fire/Server/C3FireServerConfig.xml
 <Connection
  IPNr = "127.0.0.1"
  Port = "8382"
  ... />

<HttpServer
  Type = "Jetty"
  IPNr = "127.0.0.1"
  Port = "8380"
  ... />
Set the IP number in the Connection and HttpServer configuration.
Example set the IP number to IPNr = "192.168.1.2"
It is also possible to change the the ports if needed.
Write down the local area network (LAN) IP number.
You need to configure that IP number in the Manager's client installation.
Find the server computer's IP number
To get a computers IP number open Network window: Launchpad -> System Preferences -> Network
It will open the following window.
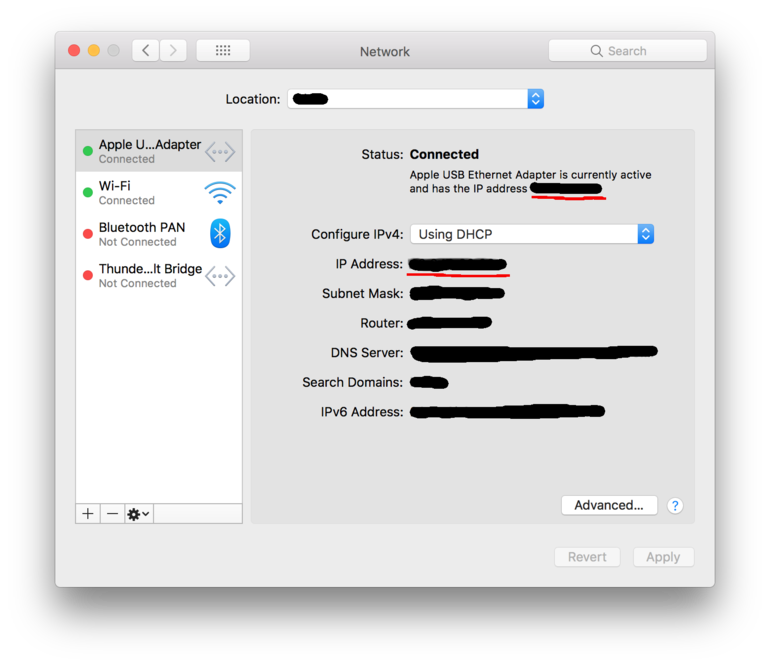
The IP number are the IPv4 Address
Server on internet (WAN)
If the C3Fire server should be accessed from internet (WAN), you need configure the Internet router to
port-forward, port 8382 and port 8380 to the C3Fire Server, and open all firewalls.
This can only your network administrator do.
The default configuration uses port:
- 8380
- 8382
Write down the wide area network (WAN) IP number you got form the network administrator.
You need to configure that IP number in the Manager's client installation.

