Table
Wiki Basic - Create Page - Format Page - Format Text - Format Code - Links - Image - Table - Folder Tree - Menu - Downloads - Project - Administration
Tables may be created in wiki pages. As a general rule, it is best to avoid using a table unless you need one.
But in the C3 Wikis we use tables to view configuration options etc.
Markup summary
| {| |
table start, required |
| |+ |
table caption, optional; only between table start and table row</translate> |
| |- |
table row, optional on first row—wiki engine assumes the first row</translate> |
| ! |
table header cell, optional.
Consecutive table header cells may be added on same line separated by double marks ( |
| | |
table data cell, optional.
Consecutive table data cells may be added on same line separated by double marks ( |
| |} |
table end, required |
- The above marks must start on a new line except the double
||and!!for optionally adding consecutive cells to a line. However, blank spaces at the beginning of a line are ignored. - XHTML attributes. Each mark, except table end, optionally accepts one or more XHTML attributes. Attributes must be on the same line as the mark. Separate attributes from each other with a single space.
- Cells and caption (
|or||,!or!!, and|+) hold content. So separate any attributes from content with a single pipe (|). Cell content may follow on same line or on following lines. - Table and row marks (
{|and|-) do not directly hold content. Do not add pipe (|) after their optional attributes. If you erroneously add a pipe after attributes for the table mark or row mark the parser will delete it and your final attribute if it was touching the erroneous pipe!
- Cells and caption (
- Content may (a) follow its cell mark on the same line after any optional XHTML attributes or (b) on lines below the cell mark. Content that uses wiki markup that itself needs to start on a new line, such as lists, headings, or nested tables, must be on its own new line.
- Pipe character as content. To insert a pipe (
|) character into a table, use the <nowiki>|</nowiki> escaping markup.
- Pipe character as content. To insert a pipe (
Basic Table
The following table lacks borders and good spacing but shows the simplest wiki markup table structure.
| Orange | Apple |
| Bread | Pie |
| Butter | Ice cream |
Is generated with the following code:
{|
|Orange
|Apple
|-
|Bread
|Pie
|-
|Butter
|Ice cream
|}
Basic Table Nice
An   inserted to separate the columns.
| Selection of screen: | Shift + Print Screen |
| Active window: | Shift + Alt + Print Screen |
Is generated with the following code:
{|
|Selection of screen:
|Shift + Print Screen
|-
|Active window:
|Shift + Alt + Print Screen
|}
Table Format Arguments
The look of a table is defined by some of the markups in the standard Cascading Style Sheets CSS. see http://www.w3schools.com/css/default.asp
Examples on table format arguments that works in some situations in MediaWiki
class="wikitable"
class="wikitable sortable"
The following css formatting arguments works in the C3 Wiki table examples below.
| Arguments | Values | Examples in C3 Wiki | ||
| background-color: #ffffcc; | red, #ffffcc; | Attributes on cells | ||
| border: 2px solid #088; | Scrolling | |||
| cellspacing="0" | ||||
| color: red; | red, #ffffcc; | Attributes on tables, Attributes on cells | ||
| colspan="6" | Table with colspan and rowspan | |||
| float: right; | Floating | |||
| height: 10em; | Scrolling | |||
| margin-left: auto; | 10px, auto | Alignment right, Floating | ||
| margin-right: 0px; | 10px, auto | Alignment right | ||
| padding-bottom: 10px; | Vertical image table with text | |||
| padding-left: 20px; | Vertical image table with text, Width defined in pixel, Image text align left | |||
| rowspan="2" | Table with colspan and rowspan, Rowspan | |||
| text-align: center; | left, center, right | Attributes on tables, Image text align left, Image text align center, | ||
| vertical-align: text-top; | Width defined in percent | |||
| width: 200px; | 200px;, 70%; | Width defined in pixel, Width defined in percent, Column width |
Examples on css formatting arguments that exist, some works in some situations in MediaWiki
style="text-align: left;"
style="text-align: center"
style="text-align: right;"
style="vertical-align: top;"
style="vertical-align: text-top;"
style="vertical-align: text-middle;"
style="vertical-align: bottom;"
style="vertical-align: text-bottom;"
style="background-color: white;"
style="background-color: #ffffcc;"
style="color: red;"
style="border: 4px solid black;"
style="border: none;"
style="cellpadding: 2;"
style="width: 30%;"
style="margin-left: auto;"
style="margin-right: 0px;"
style="margin-top: 30%;"
style="margin-bottom: inherit;"
style="padding-top: 50px;"
style="padding-right: 30px;"
style="padding-bottom: 50px;"
style="padding-left: 80px;"
style="float:right;"
Table Examples
Table with borders
Basic styling (light gray background, borders, padding and align left) can be achieved by adding class="wikitable".
| Orange | Apple |
| Bread | Pie |
| Butter | Ice cream |
Is generated with the following code:
{| class="wikitable"
|+Food complements
|-
|Orange
|Apple
|-
|Bread
|Pie
|-
|Butter
|Ice cream
|}
Table with header
Table headers can be created by using "!" (exclamation mark) instead of "|" (pipe symbol). Headers usually show up bold and centered by default.
| Orange | Apple |
|---|---|
| Bread | Pie |
| Butter | Ice cream |
Is generated with the following code:
{| class="wikitable"
|+Food complements
|-
!Orange
!Apple
|-
|Bread
|Pie
|-
|Butter
|Ice cream
|}
Table with colspan and rowspan
You can use HTML colspan and rowspan attributes on cells for advanced layout.
| Shopping List | |||||
|---|---|---|---|---|---|
| Bread & Butter | Pie | Buns | Danish | Croissant | |
| Cheese | Ice cream | Butter | Yogurt | ||
Is generated with the following code:
{| class="wikitable"
!colspan="6"|Shopping List
|-
|rowspan="2"|Bread & Butter
|Pie
|Buns
|Danish
|colspan="2"|Croissant
|-
|Cheese
|colspan="2"|Ice cream
|Butter
|Yogurt
|}
Attributes on tables
You can add XHTML attributes to tables. For the authoritative source on these, see the W3C's HTML Specification page on tables.
Placing attributes after the table start tag ({|) applies attributes to the entire table.
| Orange | Apple | 12,333.00 |
| Bread | Pie | 500.00 |
| Butter | Ice cream | 1.00 |
Is generated with the following code:
{| class="wikitable" style="text-align: center; color: red;"
|Orange
|Apple
|12,333.00
|-
|Bread
|Pie
|500.00
|-
|Butter
|Ice cream
|1.00
|}
Attributes on cells
You can put attributes on individual cells. For example, numbers may look better aligned right.
Is generated with the following code:
| Orange | Apple | 12,333.00 |
| Bread | Pie | 500.00 |
| Butter | Ice cream | 1.00 |
Is generated with the following code:
{| class="wikitable"
| Orange
| style="color: red;" | Apple
| style="text-align:right;" | 12,333.00
|-
| Bread
| Pie
| style="text-align:right;" | 500.00
|-
| Butter
| Ice cream
| style="text-align:right; background-color:#ffffcc;" | 1.00
|}
Column width
Column width can be added as example.
| This column width is 85% of the screen width (and has a background color) | |
|
This column is 30% counted from 85% of the screen width |
This column is 70% counted from 85% of the screen width (and has a background color) |
Is generated with the following code:
{| style="color: black; background-color: #ffffcc; width: 85%;"
| colspan="2" | This column width is 85% of the screen width (and has a background color)
|-
| style="width: 30%; background-color: white;"|
'''This column is 30% counted from 85% of the screen width'''
| style="width: 70%; background-color: orange;"|
'''This column is 70% counted from 85% of the screen width (and has a background color)'''
|}
Alignment right
Table alignment is achieved by using CSS. The table alignment is controlled by margins. A fixed margin on one side will make the table to be aligned to that side, if on the opposite side the margin is defined as auto. To have a table center aligned, you should set both margins to auto
For example, a right-aligned table:
| Orange | Apple |
| Bread | Pie |
| Butter | Ice cream |
Is generated with the following code:
{| class="wikitable" style="margin-left: auto; margin-right: 0px;"
| Orange
| Apple
|-
| Bread
| Pie
|-
| Butter
| Ice cream
|}
Floating
If you align a table to the right or the left side of the page, the text that comes after the table starts at the end of it, leaving an empty space around the table. You can make the text to be wrapped around the table by making the table to float around the text instead of just aligning it. This can be achieved using the float CSS attribute, which can specify where the table floats to the right side or to the left. When using float, margins doesn't control table alignment and can be used to specify the margin between the table and the surrounding text.
| Orange | Apple |
| Bread | Pie |
| Butter | Ice cream |
Lorem ipsum dolor sit amet, consectetuer adipiscing
elit, sed diam nonummy nibh euismod tincidunt ut
laoreet dolore magna aliquam erat volutpat. Ut wisi
enim ad minim veniam, quis nostrud exerci tation
ullamcorper suscipit lobortis nisl ut aliquip ex ea
commodo consequat. Duis autem vel eum iriure dolor
in hendrerit in vulputate velit esse molestie consequat,
vel illum dolore eu feugiat nulla facilisis at vero
eros et accumsan et iusto odio dignissim qui blandit
praesent luptatum zzril delenit augue duis dolore te
feugait nulla facilisi.
Is generated with the following code:
{| class="wikitable" style="float:right; margin-left: 10px;"
| Orange
| Apple
|-
| Bread
| Pie
|-
| Butter
| Ice cream
|}

Lorem ipsum dolor sit amet, consectetuer adipiscing
elit, sed diam nonummy nibh euismod tincidunt ut
laoreet dolore magna aliquam erat volutpat. Ut wisi
enim ad minim veniam, quis nostrud exerci tation
ullamcorper suscipit lobortis nisl ut aliquip ex ea
commodo consequat. Duis autem vel eum iriure dolor
in hendrerit in vulputate velit esse molestie consequat,
vel illum dolore eu feugiat nulla facilisis at vero
eros et accumsan et iusto odio dignissim qui blandit
praesent luptatum zzril delenit augue duis dolore te
feugait nulla facilisi.
Sorting
The values in a table can be sorted when the table class="wikitable sortable" is used.
Example:
{| class="wikitable sortable"
|+Sortable table
|-
! Alphabetic !! Numeric !! Date !! class="unsortable" | Unsortable
|-
| d || 2 || 2008-11-24 || This
|-
| b || 8 || 2004-03-01 || column
|-
| a || 6 || 1979-07-23 || cannot
|-
| c || 4 || 1492-12-08 || be
|-
| e || 0 || 1601-08-13 || sorted.
|}
The above code produces the following result on the page:
| Alphabetic | Numeric | Date | Unsortable |
|---|---|---|---|
| d | 2 | 2008-11-24 | This |
| b | 8 | 2004-03-01 | column |
| a | 6 | 1979-07-23 | cannot |
| c | 4 | 1492-12-08 | be |
| e | 0 | 1601-08-13 | sorted. |
Scrolling
A whole table can be placed within a scrolling area so that new table lines appear on the screen as old table lines disappear.
Wiki markup:
<div style="width: 45%; height: 10em; overflow: auto; border: 2px solid #088;">
{| class="wikitable"
|-
| abc || def || ghi
|- style="height: 100px;"
| jkl || style="width: 200px;" | mno || pqr
|-
| stu || vwx || yz
|}
</div>
The above code produces the following result on the page:
| abc | def | ghi |
| jkl | mno | pqr |
| stu | vwx | yz |
Tools
External table tools :
C3 Wiki Table Examples
Examples on tables used in the C3 Wiki.
Simply Table
| North: | 57.9375 |
| South: | 57.4922 |
| West: | 16.1444 |
| East: | 17.0082 |
Is generated with the following code:
{|
|North:
|57.9375
|-
|South:
|57.4922
|-
|West:
|16.1444
|-
|East:
|17.0082
|}
Simply Table 2
TracerMgrClient - c3systems.client.ui2D.tracer.TracerMgrClientVehicleMgrClient - c3systems.client.ui2D.vehicle.VehicleMgrClientStationMgrClient - c3systems.client.ui2D.station.StationMgrClient
Is generated with the following code:
:{|
|TracerMgrClient
| -  
|<code>c3systems.client.ui2D.tracer.TracerMgrClient</code>
|-
|VehicleMgrClient
| -
|<code>c3systems.client.ui2D.vehicle.VehicleMgrClient</code>
|-
|StationMgrClient  
| -
|<code>c3systems.client.ui2D.station.StationMgrClient</code>
|}
Simply Table 3
| Windows: |
|
| Linux: |
|
| Mac: |
Is generated with the following code:
{|
|Windows:  <br><br>
|style="vertical-align: text-top;"|
[http://www.c3learninglabs.com/download/system/c3fire-v4.1.0/c3fire-v4.1.0.0-install-windows.exe c3fire-v4.1.0.0-install-windows.exe]
|-
|Linux:  <br><br>
|style="vertical-align: text-top;"|
[http://www.c3learninglabs.com/download/system/c3fire-v4.1.0/c3fire-v4.1.0.0-install-linux.tgz c3fire-v4.1.0.0-install-linux.tgz]
|-
|Mac:  
|style="vertical-align: text-top;"|
[http://www.c3learninglabs.com/download/system/c3fire-v4.1.0/c3fire-v4.1.0.0-install-mac.tgz c3fire-v4.1.0.0-install-mac.tgz]
|}
Property Table
Background color = #bbeeff
|
Property |
Description |
|---|---|
|
Name |
Top layer UI object identification name. |
|
Size |
The size of the panel. The value is defined in pixels "width,height", "size-x,size-y", "horizontal size, vertical size" Value example = "280,170" |
|
Visible |
If the panel should be visiple. Possible values are "True" and "False". |
Is generated with the following code:
{| class="wikitable"
|+UI Object Main Properties
|-
!style="text-align: left;" |
Property
!style="text-align: left;" |
Description
|-
|style="background-color:#bbeeff; vertical-align: text-top;"|
Name
|style="vertical-align: text-top;"|
Top layer UI object identification name.
|-
|style="background-color:#bbeeff; vertical-align: text-top;"|
Size
|style="vertical-align: text-top;" | The size of the panel.<br>
The value is defined in pixels "width,height", "size-x,size-y", "horizontal size, vertical size"<br>

Value example = "280,170"
|-
|style="background-color:#bbeeff; vertical-align: text-top;"|
Visible
|style="vertical-align: text-top;"|
If the panel should be visiple.<br>

Possible values are "True" and "False".
|}
Parameter Table
Background color = #ddffdd
|
Parameters |
Description |
|---|---|
|
Name |
Top layer UI object identification name. |
|
Size |
The size of the panel. The value is defined in pixels "width,height", "size-x,size-y", "horizontal size, vertical size" Value example = "280,170" |
|
Visible |
If the panel should be visiple. Possible values are "True" and "False". |
Is generated with the following code:
{| class="wikitable"
|+UI Object Main Parameters
|-
!style="text-align: left;" |
Parameters
!style="text-align: left;" |
Description
|-
|style="background-color:#ddffdd; vertical-align: text-top;"|
Name
|style="vertical-align: text-top;"|
Top layer UI object identification name.
|-
|style="background-color:#ddffdd; vertical-align: text-top;"|
Size
|style="vertical-align: text-top;" | The size of the panel.<br>
The value is defined in pixels "width,height", "size-x,size-y", "horizontal size, vertical size"<br>

Value example = "280,170"
|-
|style="background-color:#ddffdd; vertical-align: text-top;"|
Visible
|style="vertical-align: text-top;"|
If the panel should be visiple.<br>

Possible values are "True" and "False".
|}
Width defined in percent
|
Organisation Configuration |
The user interfaces and communication tools can be individual set-up for all participants in a session. When collaboration is mediated via computer systems, the system design impacts on the collaborative process. This means that the session controller may have explicit control over some aspects of collaboration. |
|
Simulation Configuration |
With the simulation configuration the session designer can define the properties of the geographical environment, the characteristics of the target system (the fire) and the properties of the simulated resources that the trained organisation can use to solve their task. |
|
Scenario |
With the scenario definition the session designer can define the dynamic characteristics of the session settings. It consists of events that will effect the session at some specified time. |
Is generated with the following code:
{| style="width: 70%;"
| style="width: 20%; vertical-align: text-top;"|
'''Organisation Configuration'''
| style="width: 50%;"|
The user interfaces and communication tools can be individual set-up for all participants in a session. When collaboration is mediated via computer systems, the system design impacts on the collaborative process. This means that the session controller may have explicit control over some aspects of collaboration.<br><br>
|-
| style="vertical-align: text-top;"|
'''Simulation Configuration'''
|With the simulation configuration the session designer can define the properties of the geographical environment, the characteristics of the target system (the fire) and the properties of the simulated resources that the trained organisation can use to solve their task.<br><br>
|-
| style="vertical-align: text-top;"|
'''Scenario'''
|With the scenario definition the session designer can define the dynamic characteristics of the session settings. It consists of events that will effect the session at some specified time.
|}
Width defined in pixel
|
Doing nothing |
The fire-fighting unit stands still on a position on the map, waiting for a fire to start at the position or to get instructions from the user. |
|
Moving |
The fire-fighting unit is moving towards a specific position on the map. The user can select the position by selecting the unit intended position. |
|
Fire Fighting |
The fire-fighting unit stands still on a position fighting the fire. When the fire is closed out or burned out the unit automatically start to demobilize. |
Is generated with the following code:
{| style="width: 530px;"
| style="width: 150px; vertical-align: text-top; padding-left: 30px;"|
'''Doing nothing'''
| style="width: 380px;"|
The fire-fighting unit stands still on a position on the map, waiting for a fire to start at the position or to get instructions from the user.<br><br>
|-
| style="vertical-align: text-top; padding-left: 30px;"|
'''Moving'''
|The fire-fighting unit is moving towards a specific position on the map. The user can select the position by selecting the unit intended position.<br><br>
|-
| style="vertical-align: text-top; padding-left: 30px;"|
'''Fire Fighting'''
|The fire-fighting unit stands still on a position fighting the fire. When the fire is closed out or burned out the unit automatically start to demobilize.<br><br>
|}
Horizontal Image Table
Is generated with the following code:
{|
|[[File:C3ll-users-laval-190x62.png|frame|none|link=http://www.ulaval.ca/|<br>Laval University, Canada]]
|
|[[File:C3ll-users-nps-230x100.png|frame|none|link=http://www.nps.edu/|<br>Naval Postgraduate School, USA]]
|
|[[File:C3ll-users-fhs-190x116.png|frame|none|link=http://www.fhs.se/|<br>Swedish Defence University]]
|
|[[File:C3ll-users-ude-200x57.png|frame|none|link=https://www.uni-due.de/|<br>University Duisburg-Essen Germany]]
|}
Vertical image table with text
|
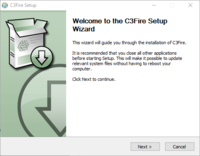
Press < Next >. | |
|
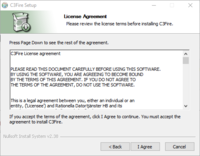
Read and press < I Agree >. | |
|
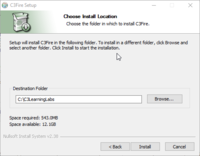
You should install the system at C:\C3LearningLabs\ |
Is generated with the following code:
{|
|style="padding-bottom: 10px;" |
[[File:C3fire-config-install-1.png|200px|C3Fire Install]]
|style="padding-left: 20px;" |
Press < Next >.
|-
|style="padding-bottom: 10px;" |
[[File:C3fire-config-install-2.png|200px|C3Fire License Agreement]]
|style="padding-left: 20px;" |
Read and press < I Agree >.
|-
|style="padding-bottom: 10px;" |
[[File:C3fire-config-install-3.png|200px|C3Fire Install folder]]
|style="padding-left: 20px;" |
You should install the system at C:\C3LearningLabs\ <br>Do not change destination folder.
|}
Vertical image table with text 2
|
Refilling water |
|
|
Giving water |
Is generated with the following code:
{|
|style="padding-bottom: 10px;" |
Refilling water
|style="padding-left: 20px;" |
[[File:C3fire-doc-modules-water-activity-refilling.gif|Refilling water]]
|-
|style="padding-bottom: 10px;" |
Giving water
|style="padding-left: 20px;" |
[[File:C3fire-doc-modules-water-activity-giving.gif|Giving water]]
|}
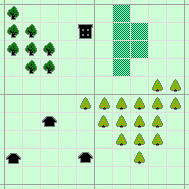
Rowspan
|
Normal |
| |
|
Birch | ||
|
Pine | ||
|
Swamp | ||
|
House | ||
|
School |
Is generated with the following code:
{|
|style="padding-bottom: 5px;" |
[[File:C3fire-pic-object-clear.gif|Normal]]
|style="padding-left: 20px;" |
Normal
|style="padding-left: 50px;" rowspan="6"|[[File:C3fire-doc-sim-obj-objects-example.gif|Objects example]]
|-
|style="padding-bottom: 5px;" |
[[File:C3fire-pic-object-birch.gif|Birch]]
|style="padding-left: 20px;" |
Birch
|-
|style="padding-bottom: 5px;" |
[[File:C3fire-pic-object-pine.gif|Pine]]
|style="padding-left: 20px;" |
Pine
|-
|style="padding-bottom: 5px;" |
[[File:C3fire-pic-object-swamp.gif|Swamp]]
|style="padding-left: 20px;" |
Swamp
|-
|style="padding-bottom: 5px;" |
[[File:C3fire-pic-object-house.gif|House]]
|style="padding-left: 20px;" |
House
|-
|style="padding-bottom: 5px;" |
[[File:C3fire-pic-object-school.gif|School]]
|style="padding-left: 20px;" |
School
|}
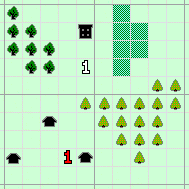
Rowspan 2
|
|
| |
|
F1 Position | ||
|
F1 Position Selected | ||
|
F1 Intention | ||
|
F1 Intention Selected | ||
|
|
Is generated with the following code:
{|
|style="padding-bottom: 5px;" |
<br>
|style="padding-left: 20px;" |
|style="padding-left: 50px;" rowspan="6"|[[File:C3fire-doc-sim-unit-example.gif|Unit example]]
|-
|style="padding-bottom: 0px;" |
[[File:C3fire-pic-number-red-1.gif|F1 Position]]
|style="padding-left: 20px;" |
F1 Position
|-
|style="padding-bottom: 0px;" |
[[File:C3fire-pic-number-red-1-selected.gif|F1 Position Selected]]
|style="padding-left: 20px;" |
F1 Position Selected
|-
|style="padding-bottom: 0px;" |
[[File:c3fire-pic-number-white-1.gif|F1 Intention]]
|style="padding-left: 20px;" |
F1 Intention
|-
|style="padding-bottom: 0px;" |
[[File:c3fire-pic-number-white-1-selected.gif|F1 Intention Selected]]
|style="padding-left: 20px;" |
F1 Intention Selected
|-
|style="padding-bottom: 5px;" |
<br>
|style="padding-left: 20px;" |
|}
Image text align left
|
Fire spread |
Fire spread |
Is generated with the following code:
{|
|[[File:C3fire-doc-sim-fire-spread-1.gif|none|Fire spread horizontal and vertical]]
|
|[[File:C3fire-doc-sim-fire-spread-2.gif|none|Fire spread Diagonal]]
|-
|style="padding-left: 20px;" |
Fire spread<br>horizontal<br>and vertical
|
|style="padding-left: 20px; vertical-align: text-top;" |
Fire spread<br>Diagonal
|}
Image text align center
|
Step 1 |
Step 2 |
Step 3 |
Is generated with the following code:
{|
|[[File:C3fire-doc-sim-fire-ignittime-1.gif|none|Ignit time 1]]
|
|[[File:C3fire-doc-sim-fire-ignittime-2.gif|none|Ignit time 2]]
|
|[[File:C3fire-doc-sim-fire-ignittime-3.gif|none|Ignit time 3]]
|-
|style="text-align: center;" |
Step 1
|
|style="text-align: center;" |
Step 2
|
|style="text-align: center;" |
Step 3
|}
Image text align bottom
|
System Load Manager |
System Load Player |
System Load Player small |
Is generated with the following code:
{|
|style="vertical-align: bottom;" |
[[File:C3fire-doc-sys-systemload-m1.png]]
|
|style="vertical-align: bottom;" |
[[File:C3fire-doc-sys-systemload-pl.png]]
|
|style="vertical-align: bottom;" |
[[File:C3fire-doc-sys-systemload-ps.png]]
|-
|style="text-align: center;" |
System Load Manager
|
|style="text-align: center;" |
System Load Player
|
|style="text-align: center;" |
System Load Player small
|}
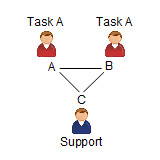
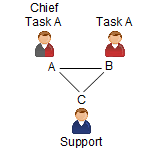
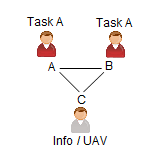
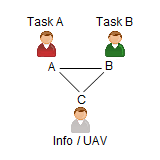
Image text align center with border
|
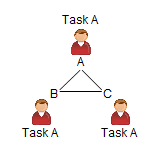
3Players |
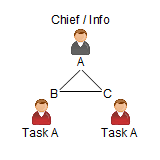
3Players |
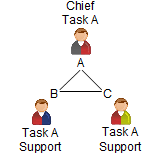
3Players |
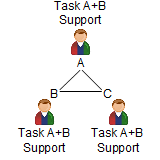
3Players |
|
3Players |
3Players |
3Players |
3Players |
Is generated with the following code:
{| border="1"
|style="text-align: center; vertical-align: text-top;" |
<B>3Players<br>1Task<br> <br> <br></B>
[[File:C3fire-doc-org-types-p3-ff3-abstract-f9-160x160.png|none|Task A, Task A, Task A]]
|style="text-align: center; vertical-align: text-top;" |
<B>3Players<br>Chief Info<br>1Task<br> <br></B>
[[File:C3fire-doc-org-types-p3-ci1-ff2-abstract-f9-160x160.png|none|Chief / Info, Task A, Task A]]
|style="text-align: center; vertical-align: text-top;" |
<B>3Players<br>Dual Role<br>Chief Info<br>1Task 2Support<br></B>
[[File:C3fire-doc-org-types-p3-ff3-sl2-abstract-f9-160x160.png|none|Chief, Task A, Task A, Support]]
|style="text-align: center; vertical-align: text-top;" |
<B>3Players<br>AllDoAll<br>2Task 1Support<br> <br></B>
[[File:C3fire-doc-org-types-p3-frs3-abstract-f9-160x160.png|none|Chief / Info, Task A, Task A]]
|-
|style="text-align: center; vertical-align: text-top;" |
<B>3Players<br>1Task<br>Support<br> <br></B>
[[File:C3fire-doc-org-types-p3-ff2-sl1-abstract-f9-160x160.png|none|Task A, Task A, Task A]]
|style="text-align: center; vertical-align: text-top;" |
<B>3Players<br>Chief 1Task<br>Support<br> <br></B>
[[File:C3fire-doc-org-types-p3-cf1-ff1-sl1-abstract-f9-160x160.png|none|Chief / Info, Task A, Task A]]
|style="text-align: center; vertical-align: text-top;" |
<B>3Players<br>1Task<br>Info UAV<br> <br></B>
[[File:C3fire-doc-org-types-p3-ff2-iu1-abstract-f9-160x160.png|none|Chief / Info, Task A, Task A]]
|style="text-align: center; vertical-align: text-top;" |
<B>3Players<br>2Task<br>Info UAV<br> <br></B>
[[File:C3fire-doc-org-types-p3-ff1-sr1-iu1-abstract-f9-160x160.png|none|Chief / Info, Task A, Task A]]
|}
Text columns
|
Step 1 |
00:00:00 |
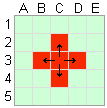
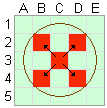
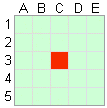
The fire starts at C3. |
|
Step 2 |
00:00:10 |
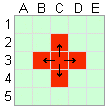
10 seconds after C3 starts burning the fire spreads from cell C3 to cell B3, C2, C4 and D3. |
|
Step 3 |
00:00:14 |
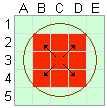
14 seconds after C3 starts burning the fire spreads from cell C3 to cell B2, D2, B4 and D4. |
|
Step 4 |
00:00:20 |
10 seconds after C2 starts burning the fire spreads from cell C2 to cell C1, etc. |
Is generated with the following code:
{|
|style="padding-bottom: 10px; vertical-align: text-top;" |
Step 1
|style="padding-left: 20px; vertical-align: text-top;" |
00:00:00
|style="padding-left: 20px; vertical-align: text-top;" |
The fire starts at C3.
|-
|style="padding-bottom: 10px; vertical-align: text-top;" |
Step 2
|style="padding-left: 20px; vertical-align: text-top;" |
00:00:10
|style="padding-left: 20px; vertical-align: text-top;" |
10 seconds after C3 starts burning the fire spreads from cell C3 to cell B3, C2, C4 and D3.
|-
|style="padding-bottom: 10px; vertical-align: text-top;" |
Step 3
|style="padding-left: 20px; vertical-align: text-top;" |
00:00:14
|style="padding-left: 20px; vertical-align: text-top;" |
14 seconds after C3 starts burning the fire spreads from cell C3 to cell B2, D2, B4 and D4. <BR>To make the fire spread in a circle from C3 the time delay is calculated by (Ignite time * 1.4142).
|-
|style="padding-bottom: 10px; vertical-align: text-top;" |
Step 4
|style="padding-left: 20px; vertical-align: text-top;" |
00:00:20
|style="padding-left: 20px; vertical-align: text-top;" |
10 seconds after C2 starts burning the fire spreads from cell C2 to cell C1, etc.
|}
Text columns with icon
|
Solving Task Type A |
Fighting Fire | |
|
Solving Task Type B |
Rescue People | |
|
Solving Task Type C |
Making Fire Breaks | |
|
Support Type A |
Water Logistic |
Is generated with the following code:
{|
|style="vertical-align: text-top;" |
[[File:Person-red-f9-30x30.png]]
|style="padding-left: 20px; vertical-align: text-top;" |
Solving Task Type A
|style="padding-left: 40px; vertical-align: text-top;" |
Fighting Fire
|-
|style="vertical-align: text-top;" |
[[File:Person-green-f9-30x30.png]]
|style="padding-left: 20px; vertical-align: text-top;" |
Solving Task Type B
|style="padding-left: 40px; vertical-align: text-top;" |
Rescue People
|-
|style="vertical-align: text-top;" |
[[File:Person-brown-f9-30x30.png]]
|style="padding-left: 20px; vertical-align: text-top;" |
Solving Task Type C
|style="padding-left: 40px; vertical-align: text-top;" |
Making Fire Breaks
|-
|style="vertical-align: text-top;" |
[[File:Person-blue-f9-30x30.png]]
|style="padding-left: 20px; vertical-align: text-top;" |
Support Type A
|style="padding-left: 40px; vertical-align: text-top;" |
Water Logistic
|}
Table with markup comments
| Beaufort Wind Scale | |||||||||
|---|---|---|---|---|---|---|---|---|---|
| No. | Wind speed | Description Class | Consequence | ||||||
| m/s | mph | Knots | American | British | French | Swedish | |||
| 0 | 0 | 0 | 0 | Light | Calm | Calme | Lugnt / Stiltje | Smoke rises vertically. | |
| 1 | 0.15 | 0.3 | 0.5 | Light | Light air | Très légère / Brise | Bris | Direction shown by smoke but not by wind vanes. | |
| 2 | 2.7 | 6 | 3 | Light | Light / Breeze | Légère / Brise | Bris | Wind felt on face; leaves rustle; ordinary vane moved by wind. | |
| 3 | 3.6 | 8 | 7 | Gentle | Gentle / Breeze | Petite / Brise | Bris / Måttlig vind | Leaves and small twigs in constant motion, wind extends light flag. | |
Is generated with the following code:
{| class="wikitable"
!colspan="10"|Beaufort Wind Scale
|-
|rowspan="2"|'''No.'''
|colspan="3"|'''Wind speed'''
|colspan="4"|'''Description Class'''
|'''Consequence'''
|-
|'''m/s'''
|'''mph'''
|'''Knots'''
|style="width: 93px;"|'''American'''
|style="width: 130px;"|'''British'''
|style="width: 130px;"|'''French'''
|style="width: 123px;"|'''Swedish'''
|
|-
|0 <!-- Beaufort -->
|0 <!-- m/s -->
|0 <!-- mph -->
|0 <!-- Knots -->
|Light <!-- American-->
|Calm <!-- British-->
|Calme <!-- French-->
|Lugnt / Stiltje <!-- Swedish-->
|Smoke rises vertically.
|-
|1 <!-- Beaufort -->
|0.15 <!-- m/s -->
|0.3 <!-- mph -->
|0.5 <!-- Knots -->
|Light <!-- American-->
|Light air <!-- British-->
|Très légère / Brise <!-- French-->
|Bris <!-- Swedish-->
|Direction shown by smoke but not by wind vanes.
|-
|2 <!-- Beaufort -->
|2.7 <!-- m/s -->
|6 <!-- mph -->
|3 <!-- Knots -->
|Light <!-- American-->
|Light / Breeze <!-- British-->
|Légère / Brise <!-- French-->
|Bris <!-- Swedish-->
|Wind felt on face; leaves rustle; ordinary vane moved by wind.
|-
|3 <!-- Beaufort -->
|3.6 <!-- m/s -->
|8 <!-- mph -->
|7 <!-- Knots -->
|Gentle <!-- American-->
|Gentle / Breeze <!-- British-->
|Petite / Brise <!-- French-->
|Bris / Måttlig vind <!-- Swedish-->
|Leaves and small twigs in constant motion, wind extends light flag.
|}
References
https://meta.wikimedia.org/wiki/Help:Table
https://en.wikipedia.org/wiki/Help:Table
https://en.wikibooks.org/wiki/Editing_Wikitext/Tables
https://simple.wikipedia.org/wiki/Wikipedia:Wikitable
Wiki Basic - Create Page - Format Page - Format Text - Format Code - Links - Image - Table - Folder Tree - Menu - Downloads - Project - Administration


