C3Fire Map Documentation
From C3LearningLabs
Map
Configuration
Map Objects
The following map symbols are included in the distribution.
| Fire Spread Delay |
|||
| Normal | 1 | Normal | |
| Birch | 2 | Slow | |
| Bush | 0.25 | Very Fast | |
| Pine | 0.5 | Fast | |
| Swamp | 0 | Not Burning |
| Aid | |
| Ammunition | |
| Bank | |
| Fuel | |
| Water |
| camp | |
| Health Centre | |
| Hospital | |
| House | |
| Police | |
| School | |
| Tent |
| People | |
| Vehicle | |
| Medical Transit Point | |
| UAV Transit Point |

|
Big landing area |

|
Big landing area hospital |
Unit symbols
The following unit symbols are included in the distribution.
| Fire Fighting Units | |
| Blue | |
| Blue light | |
| Brown | |
| Brown light | |
| Cyan | |
| Gray | |
| Gray light | |
| Green | |
| Lilac | |
| Orange | |
| Sand | |
| Yellow |
View
Synfält En enhet ser normalt 3x3 rutor, vilka markeras med svarta hörnsträck på kartan. Ledningsenheterna har ett större synfält. Under simuleringen sänder enheterna den information de ser till spelarna. Spelarna får aldrig någon i information om vad som sker utanför synfältet.
• Figure 13, Visar den simulerade branden. • Figure 14, Visar enheternas synfält. • Figure 15, Visar vad spelarna ser.
Observera att spelarna ej ser hela branden och att hela brandgatan ej syns.
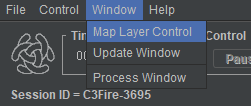
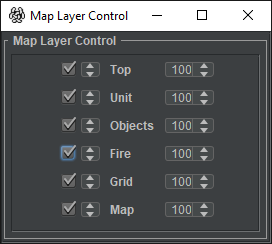
Map Layers
Map Editor
- See description at, Map Editor.
- Description below make it possible to manipulate the map objects with the user interface and save it to disk.
- The units position is moved with the map manipulation commands described below.
- Activation and editing steps
- In Players UI configuration in file <config_name>-UIMain-Mac.coni set ObjectPalette config to the information below.
- In most configurations the players UI is defined in <Layout Name = "Ground Chief" >.
   <Layout
      Name = "Ground Chief" >
      ...
      <Object
        Name = "ObjectPalette"
        BorderVisible = "True"
        Enabeled = "true"      Should be true
        Pos = "1222,290"
        Size = "120,180"
        Visible = "true"       Should be true
        VisibleObjects = "" /> Should be empty
- Start the session and let the session run.
- Edit the map in player A´s UI
- You need to ignore the fire or crenate an scenario that does not start the fire.
- Save the map: Alt-S : Se description below.
- Replace the map information in the map object position definition file.
- Example: located in condition folder, <config_name>-MapObjectsPos.coni
  <Objects>
    Insert all <Object>'s here
  </Objects>

  <DisplayObjects>
    Insert all <DisplayObject>'s here
  </DisplayObjects>
- Copy the units positions to the unit start position definition file.
- Example: located in condition folder, <config_name>-UnitsPos.coni
- Restor the Players UI configuration in file <config_name>-UIMain-Mac.coni ObjectPalette information.
- Example
   <Layout
      Name = "Ground Chief" >
      ...
      <Object
        Name = "ObjectPalette"
        BorderVisible = "True"
        Enabeled = "true"
        Pos = "1222,290"
        Size = "120,180"
        Visible = "true"
        VisibleObjects = "Pine,Birch,House,School,Hospital,Tent,Water" />
- Map editing
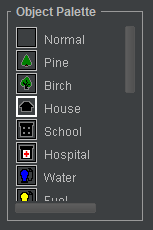
- You can select objects in the object Palette. The selected object get a white marking.
- Then you can put the objects on the map. Point on the map an press left mouse button.
- Map manipulation
- While the session is running you can do the commands described below, (Save before session end)
- The mouse pointer needs to be on the map to make the key commands to work.
- When you are ready save the map and copy the saved object and unit positions to you configuration
- Alt-S : Save, saves the map to, ...\C3LearningLabs\C3Fire\Client\Files\Root\saved-map.txt
- or ...\C3Systems\C3Fire\Client\saved-map.txt
- Alt-R : Rotate the map clockwise
- Alt-L : Rotate the map counter clockwise
- Alt-H : Mirror horizontally
- Alt-V : Mirror vertically
- Alt-T : Mirror top right bottom left
- Alt-U : Mirror top left bottom right


